
Creating the Directory Listing Form
Back to: Getting Started with GravityView
Welcome to part #2 of Getting Started With GravityView! In this section, we’re going to build the listing form for our business directory.
Creating a New Form
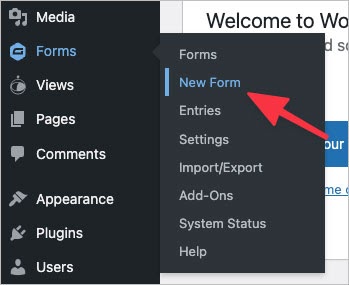
Start by creating a new form in Gravity Forms. You can do this by hovering over Forms in the left-hand menu and selecting New Form.
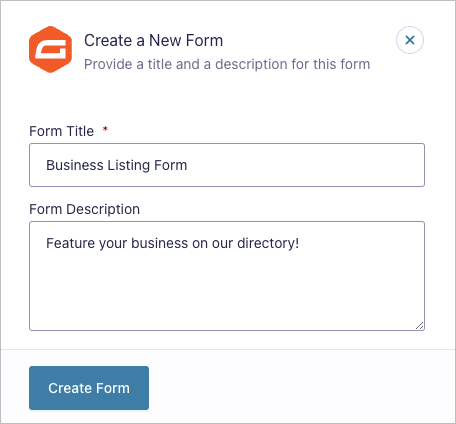
Now give your new form a name and description (optional) and click Create Form.
Now you can start adding fields to your form using the Gravity Forms drag and drop editor!
Adding Fields Using the Drag-and-Drop Builder
The Gravity Forms form builder allows you to construct forms using a drag and drop, “block-like” interface. On the right, you’ll see several tabs, allowing you to access different field types.

- Standard Fields
Here you’ll find text inputs, drop downs, checkboxes and other common form fields.
- Advanced Fields
“Advanced” fields include Phone, Email, Address and other more specialized field types.
- Post Fields
These fields are for creating posts from your form entries (we won’t be using these in the course).
- Pricing Fields
These fields are for selling products using Gravity Forms (we won’t be using these in the course).
- GravityView
Fields added by the GravityView plugin.
To add a new field to your form, simply drag and drop it onto the canvass.

We’ll add the following fields to our form:
- Business Name (Single Line text field)
- Business Summary (Single Line text field)
- Business Description (Paragraph text field)
- Address (Address field)
- Main Business Phone (Phone field)
- Business Email (Email field)
- Web Address (Website field)
- Featured Image (File Upload field)
Feel free to add any other fields you feel are necessary. When you’re finished building your directory listing form, you’ll need to embed it on a page or post.
Embedding the Form On a Page or Post
First off, create a new page by hovering over Pages and clicking Add New.
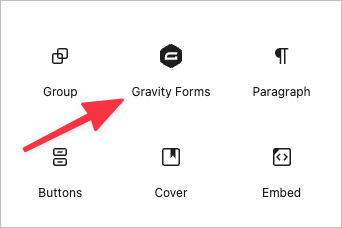
After giving your page a title, add a Gravity Forms block to your page by clicking on the ‘+’ icon and searching for “Gravity Forms”.
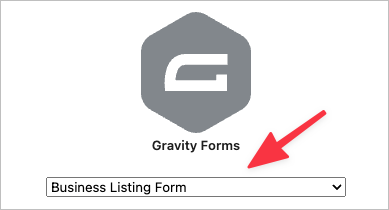
After adding the block to your page, select your new listing form from the dropdown menu.
The final step is to configure the Form Settings, where you can show/hide the form title and description.

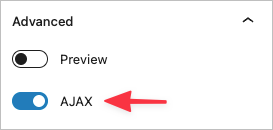
Under the “Advanced” tab, you can toggle the form preview on and off. You can also enable/disable AJAX.
When you’re done, publish your new page and open it on the front end.

That’s it! In the next section, we’ll look at form presets and how they can help you save time when creating a new application with GravityView.