
Configuring the View Settings
Back to: Getting Started with GravityView
Our business directory is nearing completion! In this section of the course, we’re going to configure the View settings. Here you’ll find various important options for enhancing and customizing your directory.
View Settings Overview
The View Settings meta box contains a range of options for customizing your View.
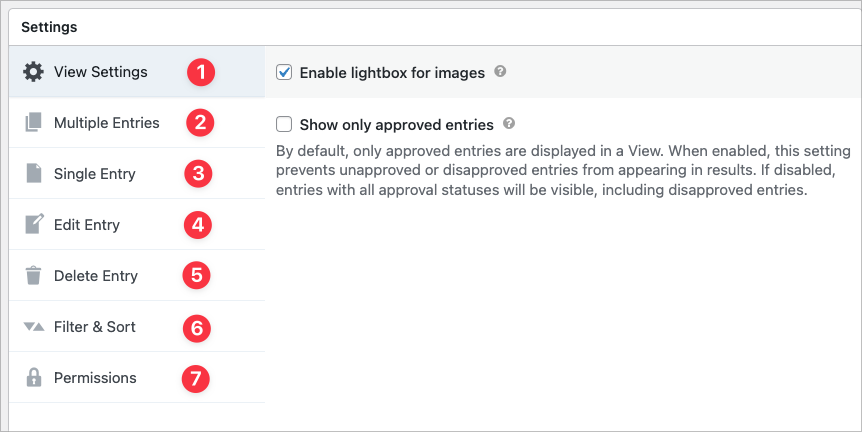
- View Settings – general options that apply to the entire View
- Multiple Entries – configuration options for the Multiple Entries Layout
- Single Entry – configuration options for the Multiple Entries Layout
- Edit Entry – configuration options for the Multiple Entries Layout
- Delete Entry – option for allowing users to delete entries they created
- Filter & Sort – options for sorting and filtering entries, including filtering by date
- Permissions – configure user permissions (allow users to export entries, prevent direct access, etc)
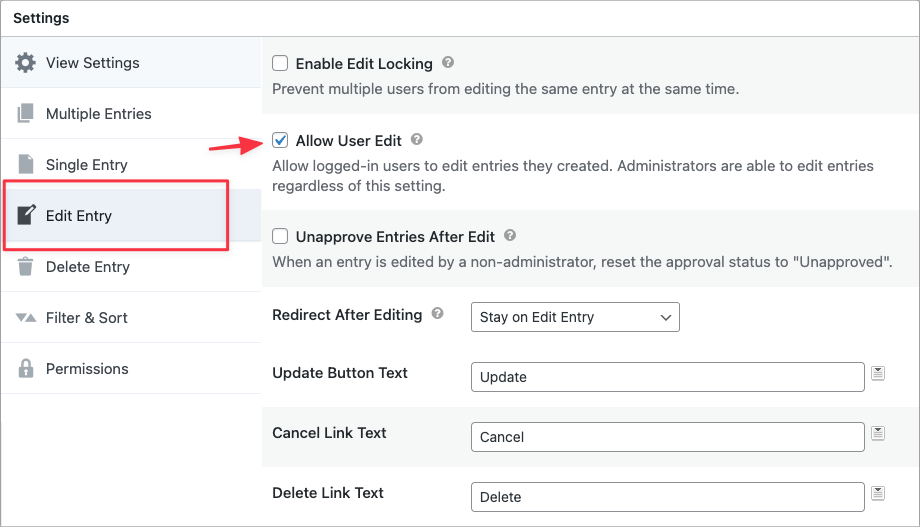
Enabling User Edit
Enabling the User Edit option will allow logged-in users to edit entries that they create. You can also unapprove entries after editing, changes the redirect settings and update the button text for the Update, Cancel and Delete buttons.
Filter and Sort Settings
The Filter & Sort tab contains a range of options, allowing you to sort entries by a particular field, change the sort direction, filter entries by date and more.

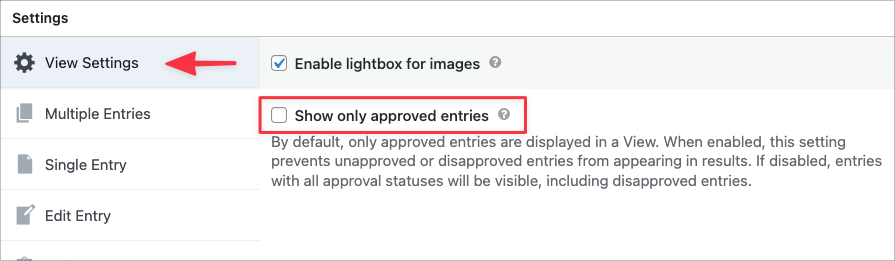
Entry Approval
If you decide to check the box that says “Show only approved entries”, you’ll need to approve each entry before it’s displayed in your directory.
There are two ways to approve entries in GravityView
Approving Entries Manually
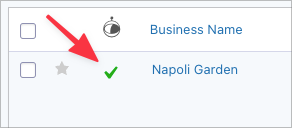
To approve entries manually, you’ll need to head over to the Gravity Forms Entries page and click on the circle icon to the left.
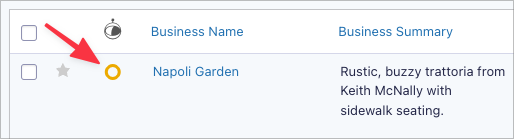
Once the entry has been approved, you’ll see a green check mark.
Approving Entries Automatically
You can also approve entries automatically when they’re created. To do this, you’ll need to add a GravityView “Approve/Reject” field to your directory listing form. This is an Admin field, meaning it’s only visible to Administrators and not regular site visitors.
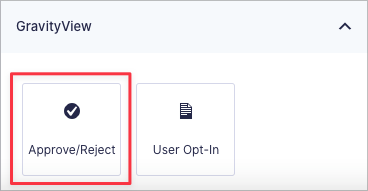
To do this, edit your form, open the GravityView tab and add the “Approve/Reject” field to the bottom of your form by dragging and dropping it.

Next, open the field settings and click on the check mark next to “Approved”. This will ensure that entries are approved by default.
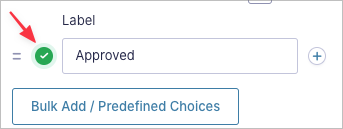
Now, instead of having to manually approve each entry as it’s created, entries will automatically have the status of “approved”. You can revoke this at any time by editing the entry and unchecking the “Approved” field.
Conclusion
We’re almost finished building our business directory! The final step is to embed it on a page or page. We’ll cover this in the next section.
See you in the next lesson 👋